Wednesday, 19 August 2015

Sweet Potato and Carrot Soup


To me, a main dish for any busy week day is all about simplicity and good flavour. This concept is exactly what this lovely and easy peasy soup recipe is based on! So I really hope you enjoy this soup with conscience because it's a real vitamin boost – which means it's super healthy, it tastes fantastic and takes the shortest time to make! Cheers!


Sweet Potato & Carrot Soup
serves 4

2 small sweet potatoes
6 carrots
6 cups water
1 tsp cinnamon
2 tsp turmeric
1 tsp powdered vegetable broth

For topping
1 pinch chilli flakes
some fresh parsley


Peel the carrots, cut in half and add into a sauce pan filled with the 6 cups of water. Bring to boil, and let cook for 25 minutes.
Peel the sweet potato as well, and cut into small chunks. About half way through the cooking of the carrots, add in the sweet potato chunks and let it all cook into the vegetables are soft.
Add in the cinnamon, turmeric and vegetable broth, and let all of this cook for another 5 minutes or so.
Finish of by running a hand mixer through the soup, so that it's all smooth. 
Serve with some chopped parsley, and sprinkle over some chilli flakes. Enjoy!


Saturday, 1 August 2015

Lentil Carrot and Coriander Burger With Avocado Hummus


It's weird, the thing about obsessions. After getting into a sort of pattern, you feel like there are certain things you can't live without...at least not live happily without. Well yes, that's my relationship with veggie burgers. It simply is something I can't live without as a vegetarian.

These burgers must be the best one's I've made this far. They are deliciously moist while having a thin and crisp crust. The taste is both quite spicy from the fresh coriander and onion, but it also has a nice sweet taste which kind of rounds off the rich flavour. The avocado hummus basically speaks for itself as both regular hummus and guacamole tastes fantastic on itself! A great tasting salad is always good to have besides, and so is the roasted almonds which gives a nice crunch and some different texture to the dish!


LENTIL CARROT AND CORIANDER BURGER WITH AVOCADO HUMMUS
Makes 10 burgers / serves 4-5

Burger
6 carrots
1 handful fresh coriander
1 yellow onion
1 tin lentils, drained // 400g
some salt and pepper
1 tsp apple vinegar
the juice from 1/2 a lemon
1/2 cup chickpea / quinoa flour

Avocado Hummus
1 tin chickpeas // 400g
1 ripe avocado
2 tbsp olive oil
1 tbsp tahini
a pinch salt and pepper
the juice from 1/2 a lemon

Salad
1 tin cooked green beans // 400g
1 cucumber
1/2 small red cabbage
10 cherry tomatoes
1 tbsp apple vinegar
the juice from 1/2 a lime
4 tbsp olive oil
1/2 cup almonds
1 tsp ground pepper spice
1 pinch ground cayenne


Start by preparing the burgers. Set of a saucepan with water to boil, and add the carrots. Let them cook for about 35 minutes depending on the thickness of the carrots. Add the fresh coriander, onion and lentils into a food processor. Blend, and once the carrots have become soft, add them in as well. Season with salt and pepper, and pour in the vinegar and lemon juice. Once blended well add the flour a little by little until it's a thick paste. Form the batter into 10 even chuncks, and press them down a bit before leaving each uncooked burger on a baking sheet until it's time to cook them.

Make the avocado hummus by adding all the ingredients into a food processor and blend for about a minute, scraping down the sides a couple of times in between. For the salad, chop the green beans in half, and put into a mixing bowl. Slice the cucumber lengthwise using a cheese cutter or something similar and do the same with the cabbage. Cut the tomatoes four times, and add it all into the salad bowl. Pour over the vinegar and lime juice and give it a stir.

Warm a frying pan and add in the olive oil once heated. Roast the almonds until they're dark golden, which will take about 10 minutes. Add the spice and stir. In the pan you already roasted the almonds in, add some more oil and cook the burgers. Let each burger cook for about 5 minutes on each side. Plate up the dish. Put some salad in the bottom. Slather on some avocado hummus, put on a couple of lentil carrot and coriander burgers and finally drizzle on the almonds!


Tuesday, 7 July 2015

Filled Zucchini With Beetroot and Carrot Paste and New Potatoes


Hi dear all of you lovely readers! To give a little update, I just arrived Berlin, and I've got to say that I'm deeply impressed by the germans when it comes to the way they've figured out their direction within the food world. Of course we still see loads of people eating deep-fried stuff such as snitzels and so on, but they're really inquisitive when it comes to developing new and healthier food habits which focuses on eating clean and organic food. We ended up eating at a really nice place called "Oliv", just outside "Alexander Platz" and I've really got to give credits for the food! So for anyone who happen to be in Berlin, I really recommend visiting that lovely restaurant!

Over to the food-part of this blogpost. Zucchini's always been a huge favourite of mine in the world of fruits and vegetables. You can basically make anything out of them and use it in every recipe you'd like, either it's stews, lasagnes, soups and even cakes! So here I chose to take the wonderful vegetable in itself and emphasize the beauty and deliciousness of this green and nourishing vegetable. This is a perfect recipe for anybody who loves zucchinis and genuinely well-cooked dishes!


 FILLED ZUCCHINI WITH BEETROOT AND CARROT PASTE AND NEW POTATOES
Serves 4

Filled Zucchini
2 large zucchini's
1/2 tin lentils
1 leek
2 charlottes
2 garlic cloves
4 cherry tomatoes
1 pinch salt and pepper
6 tbsp olive oil
1 handful thyme

Beetroot and Carrot Paste
4 small beets
4 carrots
1 tbsp tahini
3 tbsp neutral oil

Potatoes
new potatoes // try and choose the smallest ones as they contain more nutrition
some olive oil
1 pinch salt and pepper
some thyme


Start by preheating the oven to 200°C / 390°F. Roughly chop the beets and place in a saucepan with boiling water. Add in the carrots as well, and let it all boil for 50 minutes. In another saucepan, boil the potatoes for about 30 minutes until they're quite soft. Cut the zucchinis lengthwise and scrape out the seeds using the back of the spoon, but remember to put the scraped seeds into a mixing bowl. Add the lentils, chopped leek, charlottes and finely sliced garlic into the bowl, add half of the oil, salt and pepper. Stir well, and add about two spoons of the mixture into each and every of the hollowed zucchini's. Place on a baking tray, drizzle some olive oil on top, cut the tomatoes in half and place two halves on top of each zucchini. Put the thyme besides, to make them turn out crispy when taken out of the oven. Let cook for 35 minutes. When the beets and carrots are really soft, put them in a food processor and process together with some oil and tahini. Pour over into a bowl for serving. Heat a frying pan with olive oil, add the potatoes, drizzle over some salt, pepper and chopped thyme and let them roast until the skin has become really crispy. Put the potatoes in a bowl, and serve everything! Enjoy!


Saturday, 27 June 2015

Spelt Crust With Minted Avocado Topping


I am personally a huge fan of spelt flour. It's so easy to work with and it makes every pastry a dream to make and to eat afterwards! People who are really into the wave of gluten free food, know that spelt do contain gluten. But not much! As I find myself only being intolerant, which basically mean sensitive, for gluten, I don't find eating any crust or pastry made out of spelt flour any problem at all! So if you're like me, and is only sensitive for gluten, spelt is worth trying out once in a while.

Over to the crust (or pizza as one may call it) itself. Because this spelt crust is really an enjoyable and crispy option for the thin-crusted Italian style pizza. This together with the velvety soft texture of the topping and the quite interesting flavour the mint adds to the dish, this really is a wonderful and comforting dinner meal or appetizer for anybody!

SPELT CRUST WITH MINTED AVOCADO TOPPING
Serves 1-2

Crust
1 cup spelt flour
1 tsp salt
1 tsp sodium bicarbonate
1/3 cup lukewarm water
2 tbsp extra virgin olive oil


Topping
1 avocado
1 cup green lentils
about 5 mint leaves
1 tsp salt
1 tsp pepper
juice from 1/2 a lemon

Preheat the oven to 200°C / 390°F. Simply combine all of the ingredients for the crust in a mixing bowl, stir with a wooden spoon and once the dough is finally coming together, knead the dough with your hands. Let it sit for 2-3 hours. Sprinkle some spelt flour onto a clean surface, and place the dough in the middle. Roll out the dough using a rolling pin and place onto a lined baking tray. Cook in the oven for 10 minutes. Meanwhile combine the ingredients for the topping in a food processor and run it until a smooth paste. Once the crust is ready, slather the topping on top of the crust and finish off by sprinkling over some mint and oregano.


Monday, 22 June 2015

Raw Cauliflower Rice Bowl

Strong and bold flavours always have been a favourite of mine. But I still think it's important to balance those dishes out with some milder flavours once in a while. I am a strong believer of the "a little bit of everything" motto, which means that variating the dishes is essential to achieve a healthy lifestyle, but still eat delicious food all the time! Today I made myself a lovely meal consisting of only nourishing, nearly raw ingredients which somehow turned out amazing when put together. It was all sort of created by accident as I was supposed to try and make warm cauliflower rice with lentil stew, but I had forgotten to soak the lentils and as I was busy trying to find up a new dish with the cauliflower I had already food processed, It didn't come across my mind to remember and boil the cauliflower rice. But, as versatile as the cauliflower is, it really wasn't any obstacle at all, and the dish still turned out tasting phenomenal! 

RAW CAULIFLOWER RICE BOWL
Serves 4-6

1 head of raw cauliflower
1/3 of a red cabbage
1 cup fresh coriander
2 tbsp olive oil
5 handfuls of spinach
1 pinch salt and pepper
1 cup bean sprouts
the juice from 1/2 a lime
1 pinch chilli flakes
calamata olives for serving


Start off by breaking the cauliflower into small florets. In a food processor, run the florets until it's turning out with a grainy rice-like texture. With a large food processor, you can put it all in at once, but if you happen to have a smaller food processor you might have to do it two rounds. Wash the third of the red cabbage in a water and vinegar bath, and shred it using a cheese slicer or a mandolin slicer. Quickly heat the spinach in a frying pan together with some salt, pepper and olive oil for maximum 2 minutes, so that the leafs doesn't loose their nutrition. Meanwhile chop the coriander and have all of the food you have prepared in a bowl. Add in the bean sprouts, pour over the lime juice and sprinkle over chilli flakes. Toss it and serve with some olives which really gives a nice touch of sourness!

Thursday, 11 June 2015

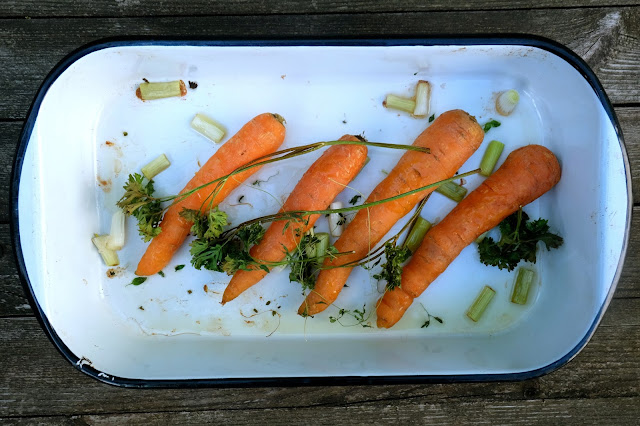
Half-Caramelized Carrots With Summer Salad


I am one of those people who simply can't get enough of root vegetables, and carrots aren't an exception. Caramelizing carrots often take up to two hours, so I thought of sharing a quicker option with you that in my opinion tastes just as well as the fully caramelized ones. The salad which is rich in antioxidants and proteins tastes pure deliciousness, and is a complete salad on it's own!


HALF-CARAMELIZED CARROTS WITH SUMMER SALAD
Makes 6 carrots / Serves 3

Half-Caramelized Carrots
6 carrots
4 parsley stalks, fresh
a small handful fresh thyme
2 scallion stalks
3 tbsp quality olive oil
1/2 tsp pink himalaya salt

Protein Antioxidant Salad
a handful spinach leaves
6 radishes
1 handful almonds


Fill up a large pot with water and place it on the stove top. Add the carrots and let it boil for 20 minutes. At this point the carrots should have begun to turn soft, but not all the way through. Preheat the oven to 180°C / 350°F. Take the carrots out of the pot, and place them in an ovenproof dish. Roughly tear the fresh herbs in your hands and add it on top of the carrots, together with large sliced scallions and some pink himalaya salt. Pour over some olive oil, and let it cook in the oven for 15 minutes. 

Meanwhile, prepare the nourishing salad by first of all making the hummus, slicing the radishes and roughly chopping the almonds. When taking the carrots out of the oven, plate up each portion by putting some spinach on the bottom, adding the radish, slathering on some delicious black bean hummus and sprinkling over the almonds. Place a couple of carrots on top together with baked scallions and the lovely, crispy herbs.

Tuesday, 9 June 2015

Middle Eastern Quinoa Bowl


It's so inspiring to see how entirely different other cultures food traditions are from ours. I mean, it's so intriguing and exiting to see the variations within the cuisine. I have always been a huge fan of middle eastern food. It must be something about the simplicity and richness of flavour that the food brings that really appeals to me. I chose to take this classic bowl - originally made on couscous, veggies and meat, and do a little twist on the dish. This really is the perfect everyday dinner, as it tastes insanely delicious and is very nourishing!


MIDDLE EASTERN QUINOA BOWL
Serves 4

1/2 cup white quinoa
1 1/2 cups water
some olive oil
1 red pepper
1 zucchini/courgette
1/2 broccoli
1/2 cauliflower
2 small organic sweet potatoes
1 avocado
1 pinch salt & pepper


Start by cooking the quinoa and sweet potatoes. Heat up the water in a pot and once it's boiling, add in the quinoa. Let it cook for 20 minutes before draining. For the sweet potatoes you need to firstly chop them into medium sized cubes before adding into a pot of boiling water. Let it boil for 15 minutes. Add a couple tablespoons of olive oil into a frying pan. Slice the red pepper and the zucchini/courgette, and let them cook for about 5 minutes before turning the vegetables to get a lovely bronzy colour on the other side as well. Set them aside. Chop the broccoli and cauliflower into medium sized bouquets and place them on the heated frying pan. Let them roast until you see that they're turning slightly darker and get a crispy surface. Chop the avocado, and place all of the vegetables and the quinoa into a mixing bowl and toss. If needed, add some salt and pepper. Serve in portions or place into a large serving plate. 

Wednesday, 3 June 2015

Zucchini Protein Falafels With Simple Nourishing Salad


Right now I'm having quite an zucchini obsession. I literally use it in every dish I make. It has such a fresh and sour taste, and it's indescribably delicious together with chickpeas and a lovely salad besides. Every single bite you take is like a dream, and the soft and moist consistency of the falafels is absolutely amazing!


ZUCCHINI PROTEIN FALAFELS WITH SIMPLE NOURISHING SALAD
Serves 3 (makes 9 falafels)

Falafels
2 zucchinis
1/2 red onion
1 tin chickpeas (400g)
1 egg
a pinch salt & pepper

Simple Nourishing Salad
2 handfuls salad leaves of own choice (I used a mix of baby leaf spinach, chard and mesclun)
8 cherry tomatoes
1 handful fresh sunflower sprouts
some extra virgin olive oil

Finely shred the zucchinis and half of the onion. Next (and probably most important) step is to drain the mixture. You can either do this in a strainer or as I like to do, just squeeze a handful of the mixture using my hands over a bowl or the sink. Place this into a mixing bowl. Blend the chickpeas in a food processor until they're evenly chopped into small grainy flour. Mix together the chickpea flour and a whisked egg with the zucchini and onion mixture, and mix properly using your hands. Heat up a frying pan and pour over some oil. As you go, form little balls of the mixture using your hands and place on the heated frying pan. Let each falafel cook for 3 minutes on each side, at least until they're getting a nice golden colour. Mix together the ingredients for the salad and serve this utterly delicious little meal, enjoying every mouthful of it!

Monday, 1 June 2015

Green Cleansing And Revitalizing Soup


In the middle of quite an exhausting week with exams and final extra schoolwork to finish up (and I apologize for not being the most active blogger the last couple of days), I took my time to mix together this utterly delicious and really nourishing soup. This soup speak for itself when it comes to healthiness. It's great when you once in a while need to cleanse and revitalize the system, and surprisingly enough doesn't take much time at all to put together.


GREEN CLEANSING AND REVITALIZING SOUP
Serves 6-8 persons

1 cauliflower
8 dl water
3 scallions
1 zucchini
4 handfuls spinach
1 handful coriander leafs, fresh
the juice from half a lemon
the juice from half a lime
1 tbsp salt
1 tbsp vegetable stock, powdered
1 small cup plain coconut milk

Cut the cauliflower into small bouquets and place them in a saucepan filled with water. Boil until they're really soft and almost falling apart, which will take around 20 minutes. Dice the scallions and zucchini and add them into the saucepan. Follow on by adding the handfuls of spinach as well as the coriander leafs, and let it all simmer on middle heat for another 20 minutes. Squeeze over some lemon and lime juice, season with vegetable stock and salt after your own preferences. Finally add the coconut milk and blend it all into a smooth soup in a blender or by using a hand blender. Enjoy! The soup will keep good in an airtight container in the fridge for up to a week. Simply heat up some in a small saucepan and it will be as good as the fresh made one!

Tuesday, 26 May 2015

North African Chakchouka


This wonderful, rustic dish is one of the best I´ve ever tasted. The dish called "chakchouka" is originally a North African dish - and a dish that they make pretty often. To be honest, I have to admit that of all continents, I think African has the best cuisine! . That because of the enormous variation of different flavours, spices and textures. All the new tastes are so exciting and different from what 
we´re used to eat, and I think that´s why I love african cuisine the most!

Chakchouka is so easy to make, and it tastes heavenly! The difference of the sweetness of the tomatoes, the slightly crunchiness of the peppers and the lovely taste of cumin is something that easily will make this dish become one of your favourites!


NORTH AFRICAN CHAKCHOUKA

1 yellow onion
2 garlic cloves
1 yellow pepper
1 red pepper
1 can organic tomato sauce
2 tsps ground cumin
a couple of saffron threads
1 pich salt & pepper
2 eggs

Preheat the oven to 200°C / 290°F. Cut the onion in half and slice each of the halves in thin slices. Add it into a pan with oil and let it simmer until they´re soft. Mash the garlic cloves in a garlic press and slice the peppers, making sure to take out the seeds first. Have this into the pan and fry it until the peppers are starting to become tender, which will probably take around 10 minutes. It´s important to stir well! At this point add the tomato sauce, cumin and saffron and season with salt and pepper. Taste, and add anything if that is needed. Pour the mixture into an ovenproof dish and carefully dig two holes in the chakchouka. Crack the eggs and place them in the middle of the recesses. Place the dish into the oven and let it cook for 15 minutes. Take the chakchouka out of the oven and enjoy with a fresh and crispy salad beside!

Sunday, 24 May 2015

Fresh Vietnamese Spring Rolls With Wild Rice And Homemade Sweet Chilli Sauce


Hi everybody! So today it was finally time to share with you guys a nice asian cuisine recipe! I call these little wraps of goodness fresh vietnamese spring rolls with wild rice and homemade sweet chilli sauce. This dish is simply amazing and so incredibly tasteful! This actually was the first time I tried these ones out, so I had a bit of a struggle in the start with the rice papers, but as I went on they got easier and easier to handle. This is a great alternative to the classic deep fried spring rolls, as thee vegetables hardly have been heated up, and therefore preserves all of the nutrition! As well, I used wild rice because it contains up to three times as much of the existing nutritional values than in white rice, such as protein, fiber, vitamins and minerals but still has only half of the calories. All in all I´m very happy with how they turned out, and I hope you get inspired to try them out as well!


FRESH VIETNAMESE SPRING ROLLS WITH WILD RICE AND HOMEMADE SWEET CHILLI SAUCE
Makes about 15 spring rolls

Spring Rolls
15 rice papers
1/3 cabbage, shredded roughly
2 carrots, julienned (cut into long thin sticks)
1/2 cucumber, julienned
1 avocado, cut into cubes
1 yellow pepper
1/2 handful fresh coriander
1 handful alpha sprouts
the juice from a lime

Wild Rice
2 dl wild rice
6 dl water

Homemade Sweet Chilli Sauce
1 cup pineapple juice
1/4 cup water
1 tbsp rice starch
1 hot chillies, finely chopped
2 garlic cloves, mashed
2 tbsps honey
some coriander for serving


Place the wild rice into a saucepan of water, and let it boil for about 40 minutes. 

 Meanwhile, prepare the filling and the rice paper and set ready a large flat bowl of lukewarm water. Soak a rice paper in the water for half a minute or until they´re really soft and bendable. Place it onto your work top and add a little bit of everything for the filling in the middle of the rice paper. Roll the bottom part of the paper up and over the filling and tighten while pulling everything towards you. Fold each of the side parts over and roll everything together. Repeat this process for every spring roll. It is a bit of a struggle in the beginning and it takes a bit patience to make each and every one, but it´s definitely worth it!

Combine all of the ingredients for the sweet chilli sauce in another saucepan and place it on the stove top on middle high heat. Bring it up to the boiling point and make sure to stir well all the time. Once you see that it´s boiling, turn down the heat and stir until the rice starch dissolves. 

Serve the spring rolls, wild rice and the delicious homemade sweet chilli sauce on a nice plate and enjoy!


Friday, 15 May 2015

Oat & Buckwheat Pizza With Greens


With the summer just around the corner, we finally got to know which subject we have the exams in...and guess what!? I luckily got the subject I was so fervently hoping on getting! I celebrated by making myself this wonderful piece of deliciousness. Give it a try, and you´ll know what I´m talking about.

Oat & Buckwheat Pizza With Greens
Serves 2

The pizza crust
1 organic egg
1 cup cold water
1/2 cup oats
1/3 cup buckwheat flour
1 tsp apple puré
1 pinch of salt

Topping
1 cup sour cream (I used alternative sour cream based on oat milk)
2 tbsps extra virgin olive oil
1 pinch of salt & pepper
1 garlic clove, crushed
3 handfuls fresh spinach
1/2 zucchini
some balsamico

 Preheat the oven to 220°C / 430°F. Start by adding the oats into a food processor and pulse until it´s formed a fine flour. Make the pizza crust by whisking the egg and adding in the rest of the ingredients. Stir, and spread it onto a baking tray but making sure that you already greased the baking tray with some oil and sprinkled over some buckwheat flour. Place the pizza crust in the oven and let it cook until it has a deep golden colour. This will probably take around 15 minutes. Mix together sour cream, olive oil, garlic, salt and pepper in a bowl. Slice the zucchini, and heat a frying pan. Roast the zucchini for about two minutes on each side and once you turn the zucchinis over to roast for another two minutes, add in the spinach to the frying pan. Smear the sour cream mixture onto the pizza crust and add the zucchini and spinach. Finally pour over some good quality balsamico and enjoy!

Saturday, 9 May 2015

Rustic Root Vegetables


For the moment I´m having a real obsession with root vegetables. They´re high in vitamins and minerals which have been absorbed from the ground, and they´re also a fantastic source of fiber! The two rood vegetables I added to this plate, simply are my all time favourites. This is such a great dish to make to treat yourself with some delicious food, and the best part is that it does not take that much effort to prep and make.


Rustic Root Vegetables
Serves two

2 medium sized beets 
1 medium sized sweet potato
some olive oil
1 cup black quinoa 
2 cups water

Optional:
some alpha sprouts

Preheat the oven to 200°C / 400°F. Start by dicing the root vegetables into cubes. Heat some water in a casserole up to it´s boiling point and add in the beets. Let them boil for about 40 minutes until they are tender all the way through. Halfway through the cooking of the beets, have the sweet potato cubes onto a baking tray. Add some olive oil and place it in the oven for 20 minutes. Boil two cups water in another casserole and add in the quinoa. Let this boil for another 20 minutes, and drain it under cold water to make it more fluffy. Since I made cauliflower pizza the other day, I made an extra pizza crust and stored it in the freezer. If you chose to do the same, slice the crust into pizza slices and place it in a heated frying pan together with some olive oil. Serve by slathering on some black bean humus and adding some alpha sprouts. Place it all on a plate and enjoy this wonderful rustic bowl of root veggies and other goodness!